Sunday, September 11, 2011

Campus Book Rentals

Every year I have the lucky job of making the student's art supply list. A lot goes into making that list. Beyond that the student's have a book list. Many get their books new. It's hard to have a book sell back program at a small art school. As much as we would love to start getting digital books, the students do not have laptops first semester. Even when they get their MacBooks, publishing companies for ebooks are not consistent. Some rent out books, while others sell them to keep. Many have no page numbers on the book, so it's hard to tell the students to read certain pages. There are just too many what if problems with books online.

This is why I love the idea of Campus Book Rentals.


Now I'm an art instructor at the Creative Center.

When it comes to art, there are supplies and more supplies to buy. When it comes to classes, each book costs money.

Now there is a way to reduce that money. There is a company called Campus Book Rentals.

My top 10 loves about Campus Book Rentals

  1. They have a huge selection of books. 
  2. They have live help. I think this is so important because I can for see a lot of questions that people might have. Sometimes text books have version after version. It gets really confusing which version is the most current.
  3. There is no fee to sign up.
  4. They have a 1-800 number. It's very visible. :) It really annoys me when I go to a site and can't find a phone number to call.
  5. College students spend only half of what they would if they bought the book full price. They sometimes save more then half! If the student loves the book they can keep it and just pay the difference. 
  6. The book can be highlighted or underlined in with no additional cost to the student.
  7. Renting a book is kinder to the environment. Books that you don't want to buy, but need, is then reused by someone else. 
  8. The book can be returned in 30 days for any reason. I know instructors change their mind on books a lot.
  9. The shipping is easy. The company actually gives the student a self addressed envelope for easy returning.
  10. For every book rented, they donate money to Operation Smile. A nonprofit organization that helps children that are born with a cleft pallet.  

Check out their video:


Disclaimer: The opinions on this post are my personal take on the products. This blog is a personal blog written and edited by me. I am not compensated to provide my opinion except for receiving the a basket of chocolate covered fruit. If you have questions about this post please contact me at: alissa4illustrationAThotmailDOTcom

Sunday, August 14, 2011

Superman Cake

I made a chocolate cake in two round pans. Then I made 1/2 a batch of red velvet cake in a square pan. I was planning on having the two circle cakes as a base for the superman logo; cut out of the square cake.

This is where disaster struck! The red velvet cake crumbled to pieces when I tried to get it out of the pan! I was mad! A cuss word or two may have come out of my mouth. By the way I really do not cuss very often! I vow every year that I'm going to stick to cookies! It seems like once a year this happens!

Here's my process: I spray the pan first, sprinkle it lightly with flour before pouring the batter in. The cake is fully done; toothpick comes out clean! Then it's really cool before I decide to pop it out! I even help the edges with a spatula. What am I doing wrong?

I decided to wrap up everything {even the crumbled pieces} and go to bed. In the morning I had a brilliant idea. Why not use the crumbled up velvet cake? One of my worst pet peeves is discarding something that is perfectly edible! I crumbled the cake up even more, added frosting to the cake, and sandwiched the two chocolate cakes together with it. Then instead of using tons of red food coloring for the logo, I used red velvet cake/frosting mixture.


Sunday, August 7, 2011

Chocolate Malt Cookies

I found a new cookie recipe I LOVE! I found the recipe here. This is the second time I've made them. They are so yummy!


{Cookies}

    • 2 cups plus 2 tablespoons all-purpose flour
    • 1/2 cup unsweetened Dutch-process cocoa powder
    • 1/4 cup plain malted milk powder
    • 1 teaspoon baking soda
    • 1/2 teaspoon coarse salt
    • 1 cup (2 sticks) unsalted butter, room temperature
    • 1 3/4 cups sugar
    • 1 large egg
    • 2 teaspoons pure vanilla extract
    • 1/4 cup heavy whipping cream
    • 3 tablespoons hot water
    •  
    • {Cookie Directions}
    •  
    1. Preheat oven to 350 degrees. 
    2. Sift together flour, cocoa powder, malted milk powder, baking soda, and salt. With an electric mixer, beat butter and sugar on medium-high speed until pale and fluffy. Mix in egg, heavy wiping cream, and hot water. Reduce speed to low; mix in flour mixture.
    3. Space tablespoon-size balls of dough 3 1/2 inches apart on parchment paper-lined baking sheets. 
    4. Bake until flat and just firm, 10 to 12 minutes. Let cool on parchment on wire racks.
    •  
  • {Filling}


    • 10 ounces semisweet chocolate, coarsely chopped
    • 4 tablespoons (1/2 stick) unsalted butter, cut into small pieces
    • 1 cup plain malted milk powder
    • 3 ounces cream cheese, room temperature
    • 1/4 cup plus 2 tablespoons half-and-half
    • 1 teaspoon pure vanilla extract


{Filling Directions}


  1. Melt chocolate and butter in a heatproof bowl. Stir. Let cool. With an electric mixer, beat malted milk powder and cream cheese on medium speed until smooth. Gradually mix in half-and-half, chocolate mixture, and vanilla. Refrigerate, covered, until thick, about 30 minutes. Mix on high speed until fluffy, about 3 minutes.


{Assemble Cookies}


  1. Spread a heaping tablespoon filling on the bottom of one cookie. Sandwich with another cookie. Repeat.

    Monday, June 20, 2011

    June Berry Crisp

    My son's and I picked a lot of berries off of our Service Berry tree a week ago.


    I put them in muffins, pancakes and made a crisp that was yummy!


    Recipe: 

    Ingredients

    • 2 cups June Berries
    • 2 cups of another kind of berry, chopped up apple or just more June Berries. I happened to use black berries this time.
    • 4 tablespoons white sugar
    • 2 cups all-purpose flour
    • 2 cups rolled oats
    • 1 1/4 cups packed brown sugar
    • 1 teaspoon ground cinnamon
    • 1/2 teaspoon ground nutmeg
    • It called for 2 sticks of butter, but I used 1 and the rest was coconut oil.

    Directions

    1. Preheat oven to 350 degrees.
    2. In a large bowl, gently toss together blackberries, raspberries, blueberries, and white sugar; set aside.
    3. In a separate large bowl, combine flour, oats, brown sugar, cinnamon, and nutmeg. Cut in butter until crumbly. Press half of mixture in the bottom of a glass pie dish. Cover with berries. Sprinkle remaining crumble mixture over the berries.
    4. Bake in the preheated oven for 30 to 40 minutes, or until fruit is bubbly and topping is golden brown.
    Served: 
    We served ours with ice cream. Yummy! Then for breakfast I topped off plain yogurt with June Berry Crisp. It was very good!

    Sandcastle Bundt Cake

    I made a Sandcastle Bundt Cake last week for work.


    It seemed to be a big hit at work. I think a few people thought I carved the castle out! Nope! I didn't tell them otherwise. ;) I did make the cake from scratch. You can buy the pan here.

    Friday, June 17, 2011

    Thursday, June 2, 2011

    Custom is Cool

    I like things that are custom! It's fun being able to choose what goes in your food, or a product that fits your needs and wants.

    One company that I really like is Chocri. It's a company where you design your own chocolate bar. They have lots to choose from. I know I'd pick dark chocolate with raspberry bits for sure!


    New Age Mama is hosting a giveaway for Chocri. Ten winners will receive 3 customized bars!

    Wednesday, June 1, 2011

    The World's Most Artistic Marriage Proposal


    Nordic Ware

    I like making a fun breakfast for my kid's. I recently got ceramic face plates. We often decorate their plates with all different foods. They love it! It's a great way to get them to eat what you'd like for them to eat. I find myself saying, "Mica eat his hair" when it's green beans. ;)

    My kids are huge breakfast eaters. I've made heart shaped pancakes. One of my favorite breakfast recipes is here.

    My Organized Chaos is giving away Nordic Ware - Kitchenware Products for you Home.

    The products include: Zoo Friends Pancake Pan and Pro Cast Castle Bundt Pan. I have the Pro Cast Castle Bundt Pan; it makes really cool looking cakes! My sister and I have used it for birthday parties. I would like the Zoo Friends Pancake Pan! My kid's would really love taking a bite into a zoo animal pancake!


    Tuesday, May 31, 2011

    Hemispheres, Earth Cake


    Yesterday we hosted my son's third birthday party and my nephew's sixth birthday party.

    Our theme was space, so I wanted to make a planet cake of some sort. I made a chocolate chip cookie sheet cake with stars as a base.

    Then I used a Wilton Sports Ball Pan Set.  

    Photo found here.

    We left the cake separated. That way each kid had a spot for their year.

    I made the cake, put on the blue frosting and mixed up all the others. My husband put on the details. He's an artist, and you can see his work here. He's super into geology. If you looked at this cake up close, you can spot out most everything on the world. My Dad and Brother-in-law were like, "There is Madagascar!" and so on.


    Top View


    Monday, April 18, 2011

    Calabsas Candy

    I love the art of making sweet treats!

    Check out these yummy looking eggs by Calabsas Candy!


    These look like glycerin soap. I don't mean that in a bad way!


    Kostiuk Crew is hosting a giveaway for one winner to win $20 worth of candy from: Calabsas Candy!

    Sunday, April 17, 2011

    Cakesters

    Candy Stick Lane inspired me to make these Caksters. They are yummy!


    How to make them:

    In a mixing bowl mix 1 box of any cake mix, 1 egg, 1/4 Olive Oil and 1/4 Buttermilk.

    *If you have no Buttermilk, here's a substitute: This makes 1 cup, so you can cut it in 1/2 depending on what you are making. 1 Tablespoon lemon juice plus enough milk or plain yogurt to fill a cup. Let stand 5 minutes before using. I used this alternative recipe to make Buttermilk to make the Cakesters.


    The dough will be stiff. Roll the dough into 1/2 inch balls and place on a cookie sheet. You can make different sizes, but in this case I like a smaller size.


    Bake at 350 degrees for 8 to 10 minutes.

    I found that they were a little soft when I got them out of the oven, so the first time I made these I didn't think they were done. I didn't over cook them, but they were not as moist as the second time that I made them. Just insert a toothpick to test if they are done. If the toothpick comes out clean, they are good to go!

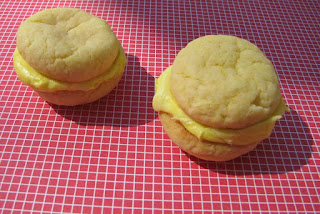
    Frost them and sandwich.

    Here is the Red Velvet Cake with the Cream Cheese Frosting:


    Here is the Lemon Cake with the Lemon Frosting:


    I make some things like this to get rid of frosting. When I ran out I really didn't want to open another container. I made a few ice cream sandwiches. My boy's LOVED them! You have to work QUICK.

    Friday, April 1, 2011

    Wilton ROCKS!

    Two of a Kind Working on a Full House is hosting an Wilton Easter product giveaway! I love making spring cookies!

    This is all the stuff you can win:


    Monday, March 21, 2011

    More Ice Cream Cones

    I made these for our work's, preschool and for my sister that watches my boy's today.

    Vanilla, Chocolate, Lemon and Strawberry
     They are those flavors of frosting too. I put a slight amount of coco baking powder in the mix of these sugar cookies to make the cones darker. Before I baked them I painted egg on them and sprinkled sugar {I used white, but have used brown}.

    I bought Valentine M&M's on clearance. They worked perfect for the cherries on top!
    Vanilla

    Chocolate

    Lemon

    Strawberry
    What flavor would you choose?

    Tuesday, March 1, 2011

    Wordless Wednesday - Ice Cream Cone Cookies

    You'll need homemade sugar cookie dough and an ice cream cone cookie cutter.

    To frost ice cream cones you need vanilla {I use Cream Cheese}, Lemon, Chocolate and Strawberry frosting's. I mixed Lemon Extract in with the Cream Cheese and added yellow food coloring.

    I melt a little butter, mix in brown sugar and paint it on the sugar cones before they bake.

    After they are frosted.